Knowledge base article
Manage DNS zones with the cPanel Zone Editor
This article will walk you through managing DNS zones using the Zone Editor function in cPanel
Be cautious when updating your DNS records as configuring your records incorrectly can result in your site becoming dysfunctional and/or offline.
- To get started, login to your cPanel account. If you have forgotten your cPanel credentials, they were included in the original Welcome to Serversaurus or IMPORTANT: Hosting Documentation email which you should find in your inbox otherwise follow these instructions on how to update your cPanel password.
- Open the Zone Editor function, use the search bar to assist you
- You will see a list of your managed domains, to add an A Record, CNAME Record or MX Record, select from the available options to the right of the domain. If the record type you require is not available, select Manage to receive more record type options

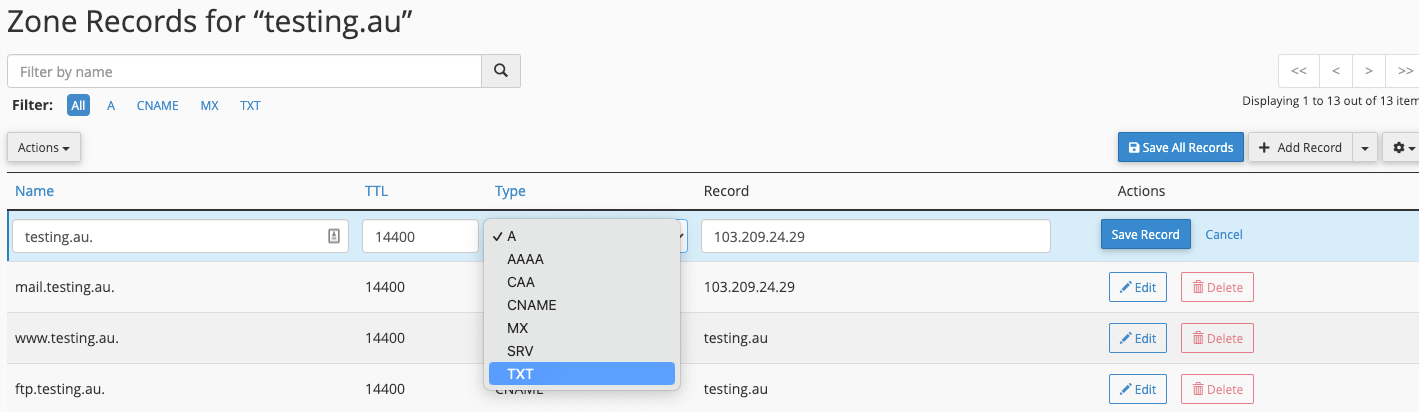
- To view an overview of your domains current DNS records, select Manage
- Use the + Add Record, Edit or Delete options to manage your zone records. You can adjust your record TTL (Time To Live) by editing record and modifying the TTL value. Select Save Record after adding or editing records
Last updated November 30, 2023