Knowledge base article
Getting Started with Virtual Machines
This guide will walk you through getting started with Virtual Machines using Serversaurus Cloud Platform
The cloud platform provides the ability to provision Windows and Linux virtual machines, which are billed by the hour.
Creating your first Virtual Machine
You can find the virtual machines interface by visiting the dashboard and visiting the Virtual Machines page. Once there, locate the Add New Virtual Machine button.
You will be greeted by a screen where you can provide the settings for the new virtual machine.
Explanation of Virtual Machine Parameters
You will need to specify a number of parameters in order to provision the virtual machine.
| Section | Property | Explanation | Example Value |
| Virtual Machine Properties | Label | A name for the virtual machine within the dashboard.Doesn't affect the operation or configuration of the actual virtual machine. | WEB-PROD-1 |
| Hostname | FQDN hostname for the virtual machine. On Linux, affects the system hostname. | web.mycompany.com.au | |
| Hypervisor Zone | Always set this to 'Utilised'. | Utilised | |
| Hypervisor | Which hypervisor to assign the virtual machine onto. Usually, you will want to choose the hypervisor with the greatest number. | HV5 | |
| Password | The administrator or root password for the machine. You may leave this blank, and one will be auto-generated. This password will be displayed within the dashboard. You may change this password later, or disable password login entirely. | ||
| Template | Operating System | Whether you wish to have a Linux, Windows or FreeBSD virtual machine. | Linux |
| Distribution | The 'flavor' of operating system. For Linux, you will want to select RHEL for CentOS/Fedora/RHEL-type systems, and Ubuntu for Debian-type systems. | RHEL | |
| Template | The specific template within those available for a distribution. You can find a full list of available templates here - we can install them by request. | Centos 6.3 x64 | |
| Resources | RAM | The available RAM (memory) for the Virtual Machine. Note that for templates that support auto-scale, a chunk of this memory may be reserved by the system and not available to applications (up to 256MB in some cases). | 512 |
| CPU Cores | CPU resources are shared between virtual machines on the cloud platform according to the formula:
Consider Guaranteed_Power to mean the CPU resources that are absolutely guaranteed to be available to the virtual machine, regardless of other guests on the hypervisor. Some burst CPU power may also be available, based on demand, which is equal to Consider Core_Speed to be a constant value at 2.4GHz. Example For instance, a machine with 2 CPU Cores and 20% CPU Priority will have 1.0Ghz guaranteed power, and 4.8GHz burst power. | 2 | |
| CPU Priority | See CPU Cores for an explanation | 10% | |
| Primary Disk | Data Store Zone | Where the root filesystem for the virtual machine will be located. If you wish to make the virtual machine tolerant against hypervisor failure, you will want to select the RAID10 SAN Datastore. If it is just an ephemeral or development machine, you can save some expense by choosing a SAS datastore (15K SATA disks). If you are handling high availability yourself and need high IOPS, you will want to select an SSD Datastore. Please note, not all datastore types are available across all hypervisors. | RAID10 SAN Datastore |
| Primary Disk Size | How much space to allocate to the root filesystem. On Linux, most templates require at least 5GB. | 5GB | |
| Swap Disk | Data Store Zone | Where to store the swap partition. Optionally, you can omit the swap partition and run Linux with no swap. | RAID10 SAN Datastore |
| Swap disk size | Size of the swap partition. | 1GB | |
| Network Configuration | Network Zone | Mostly, you will want to select 'Public Network Zone' in order to have the machine accessible from the internet. | Public Network Zone |
| Port Speed | Network throughput to limit the external interface of this virtual machine. | 100MBPS | |
| Automation Settings | Required automatic backup | Whether to enable automatic virtual machine backups (day, week, month, year). | |
| Build virtual machine automatically | Whether to provision as soon as submitting the current page | ||
| Enable autoscale | Whether to enable the auto-scale functionality of the platform. This requires careful configuration, please see the article on auto-scale. |
Once you have populated these parameters, continue by selecting Create Virtual Machine.
Provisioning and Logging in
Upon hitting the Create button, it will take a few minutes for the platform to prepare the disks, write the template image, configure the operating system, and boot the machine.
Once it is done, you may login via SSH or RDP for Linux and Windows, respectively, using the password either provided or auto-generated for you.
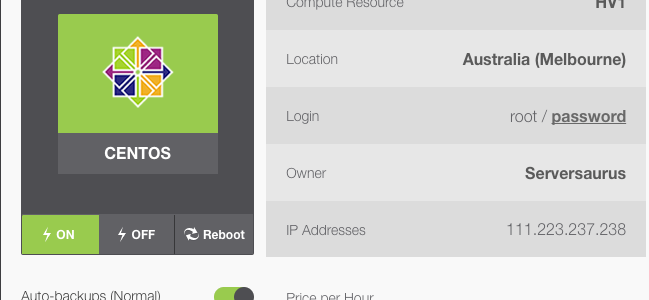
If you forget the password, it will always be available on the dashboard in the virtual machine interface (press the 'password' link to reveal it):
Last updated November 30, 2023